How to Use Data Saver on Android to Cut Down Mobile Data Usage
Android’s Data Saver feature is a simple yet powerful tool to help you cut down on mobile data usage. Whether you’re on a limited data plan, roaming abroad, or just want to avoid surprise charges, Data Saver keeps apps in check by limiting background data — all while letting you stay connected to what matters most.
Roami was founded to serve as a trusted resource for travelers in need of reliable internet solutions abroad. Our team, comprising avid travelers, provides comprehensive reviews and guidance on data SIM cards, eSIMs, pocket WiFi devices, and free WiFi apps, drawing from firsthand usage during our travels.
The 5 Best eSIM Providers for Travel
1
Holafly –
unlimited data plans in popular destinations, ideal for seamless travel
2
Ubigi –
reliable high-speed eSIMs in 190+ countries, great for business or frequent travel
3
Nomad –
flexible pay-as-you-go data for easy trave
4
BNESIM –
custom data and call bundles for long-term travelers
5
Airalo –
affordable eSIM options and solid value for most travelers
Many apps continue to use data in the background even when you’re not actively using them. That’s where Android’s Data Saver feature comes in.
Data Saver on Android helps you stay in control by limiting background data usage. It’s especially helpful when you’re on a limited data plan, roaming internationally, or simply trying to avoid overage charges.
This article will show you how to use Android’s Data Saver feature, explain how it works, and walk you through additional tips to help reduce mobile data usage and avoid surprise charges.
What Is Data Saver on Android?
Data Saver is a built-in Android setting designed to reduce how much mobile data your phone uses, especially when apps run in the background.
What it controls:
Limits background data: Apps can’t send or receive data unless you open them.
Keeps essential services running: Your phone can still make calls, send texts, and perform necessary updates.
Foreground apps still work: Apps you’re actively using (like YouTube or Gmail) can access data normally—unless further restricted.
You’re in control: You can whitelist important apps so they’re not affected by Data Saver (e.g., navigation or messaging apps).
This feature is built into Android and available on nearly all modern devices. It works silently in the background to prevent unnecessary data use without interrupting your regular phone activity.
How Does Data Saver Work?
When you enable Data Saver, Android takes several steps to limit background data use and reduce unnecessary consumption.
It blocks most background activity, preventing apps from sending or receiving data unless they’re actively open.
Sync frequency for apps like Gmail, Facebook, or news feeds is reduced, so you won’t get real-time updates until you open them.
It also disables or delays data-heavy features like auto-playing videos and media downloads—which is important considering that, according to Ericsson’s 2024 Mobility Report, video accounts for over 70% of all mobile data traffic globally.
By restricting autoplay and similar features, Data Saver helps minimize one of the biggest sources of data drain.
Tip: Device brands may customize this feature
Some Android manufacturers adjust the name or settings of Data Saver on their devices:
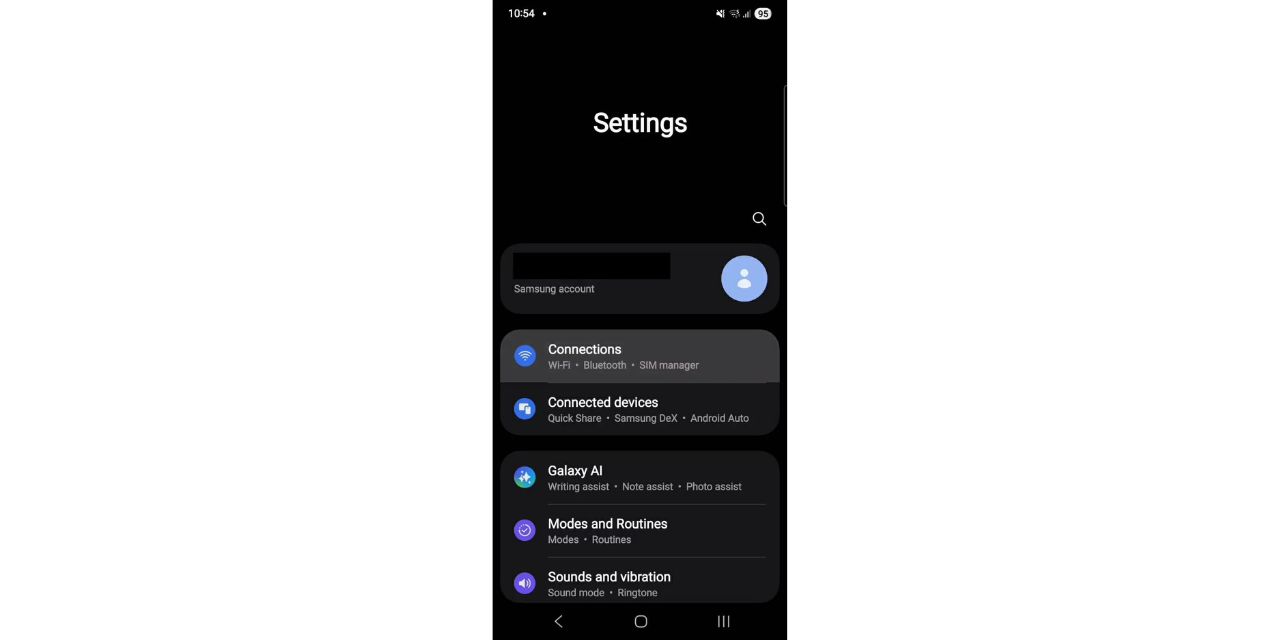
Samsung: On Galaxy devices, you’ll find it at Settings → Connections → Data usage → Data saver. This screen also includes a “Data warning & limit” option, letting you set usage alerts or caps. The images above illustrate where to find the toggle and how to whitelist individual apps.
Google Pixel: Pixel phones list Data Saver under Settings → Network & Internet → Data Saver. This interface clearly shows a toggle switch and an “Unrestricted data” list for exempting preferred apps.
Xiaomi (MIUI): Xiaomi devices handle data restrictions through battery settings. You can go to Settings → Battery & performance → Manage apps battery usage and toggle off background restrictions. The process may also appear as “Restrict background data” within individual app settings.
Realme: Realme UI typically places Data Saver options under Settings → Mobile Network → Data usage → Data Saving, with individual app controls available under Network permissions or Restrict Data Usage menus.
Huawei: Huawei labels it “Smart Data Saver”, found at Settings → Data usage → Smart Data Saver. From there, you can enable the feature and specify which apps are always allowed full data access.
Note: If your phone doesn’t clearly show a “Data Saver” option as described, use the search bar in Settings and try terms like data saver, background data, or data usage. Due to variations in Android skins, the location and label may differ slightly—but the functionality remains the same.
How to Turn On Data Saver on Android
Enabling Data Saver is quick and straightforward. Just follow these steps:
Step 1: Open the Settings app on your Android device
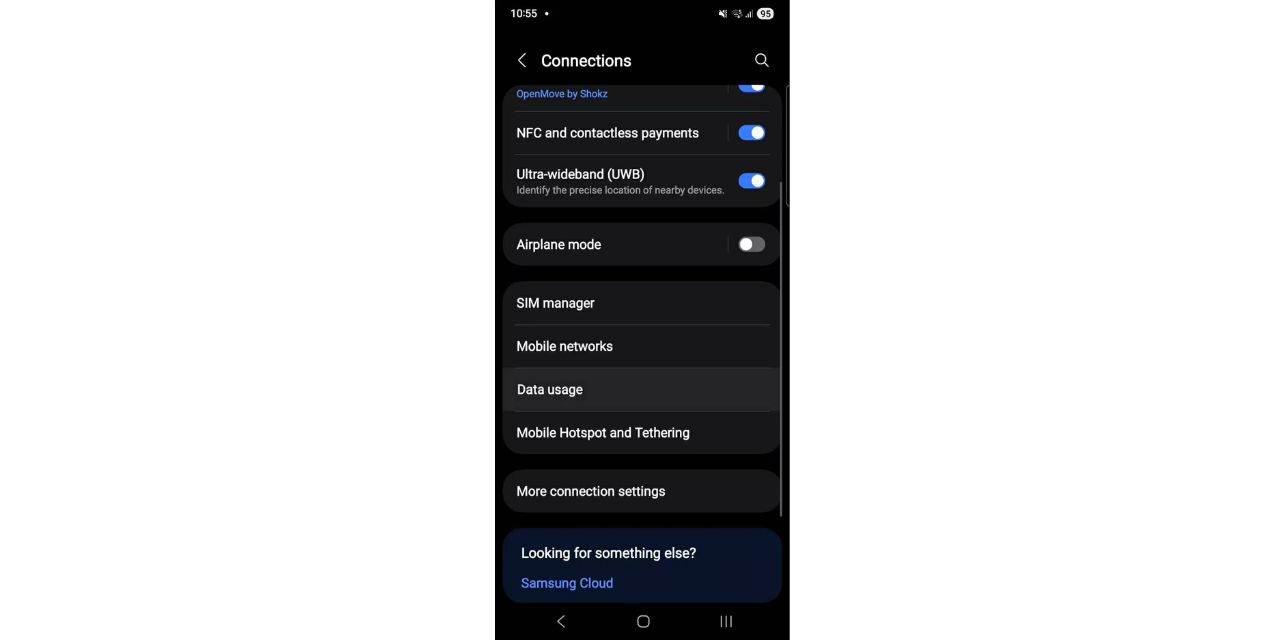
Step 2: Tap Network & Internet (or Connections if you’re using a Samsung phone)
Step 3: Select Data Saver (or Data Usage first if you’re using Samsung)
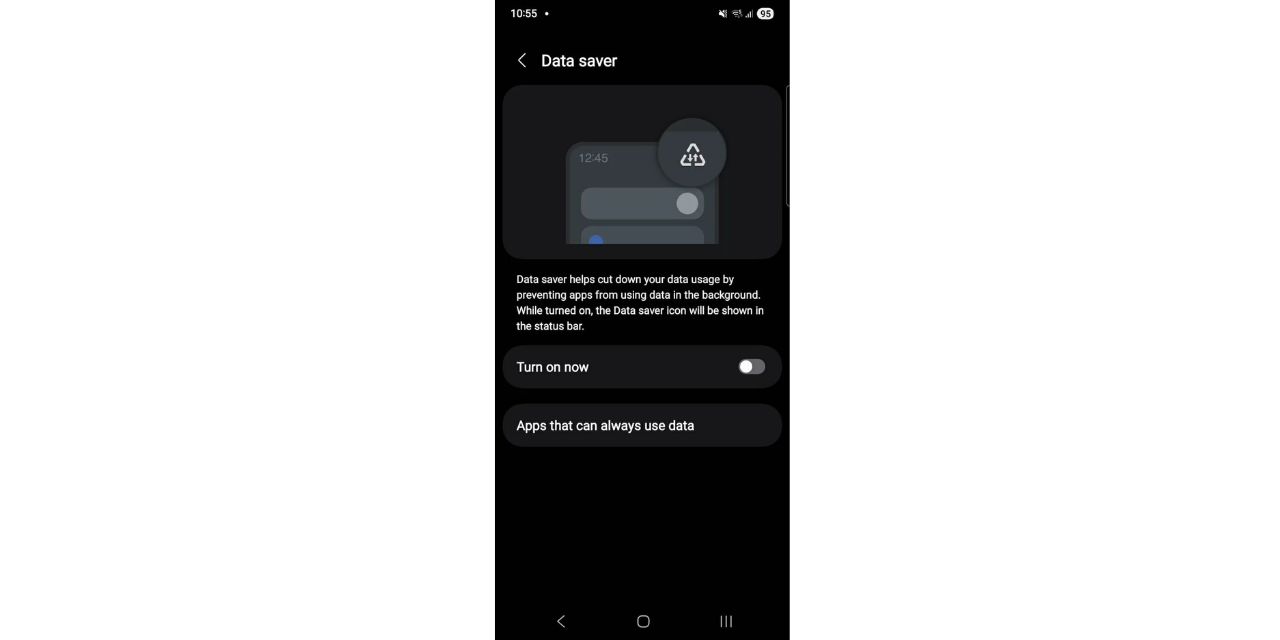
Step 4: Toggle the switch On
Once enabled, you should see a small icon (a plus sign in a circle) appear in your status bar. That’s your confirmation that Data Saver is active.
How to Allow Unrestricted Data for Specific Apps
Some apps need to run in the background to function properly—like WhatsApp for receiving messages or Google Maps for live traffic updates.
If you trust certain apps and want them to work normally even when Data Saver is on, follow these steps:
Step 1: After turning on Data Saver, tap Unrestricted data access (or look for Allowed apps while Data Saver on)
Step 2: You’ll see a list of all installed apps. Toggle On for any app you want to bypass Data Saver (e.g., messaging, navigation, or ride-share apps)
Step 3: Exit the menu — your selections are saved automatically
This gives you the flexibility to save data where it doesn’t matter and allow full access where it does.
Other Tips to Save Mobile Data on Android
Data Saver is a great start, but here are more practical ways to reduce your data usage:
Limit Play Store auto-updates: Go to Play Store > Settings > Network Preferences > Auto-update apps and set it to Over Wi-Fi only
Disable auto-play in social apps: In apps like Instagram, Facebook, or X, turn off auto-playing videos under their Settings > Data usage section
Download content for offline use: Preload maps in Google Maps, or download music and podcasts in advance using apps like Spotify or YouTube Music
Manually restrict background data for specific apps: Go to Settings > Apps > [Choose App] > Mobile data & Wi-Fi and disable Background data
These extra steps give you deeper control over how your phone uses mobile data and help you avoid surprises on your bill.
Final Advice for Managing Mobile Data on Android
Data Saver is one of the easiest tools to manage your phone’s mobile usage, but staying data-conscious requires a bit of regular maintenance.
Check data usage often: Go to Settings > Network & Internet > Data usage to see which apps are using the most data
Try data-saving browsers: Use browsers like Google Chrome (Lite mode) or Opera Mini, which compress web pages before loading
Know your plan: Be aware of your mobile plan’s data cap and whether your carrier slows speeds (throttles) after a certain threshold
Enable Data Saver when traveling: Especially when roaming or using a local eSIM or prepaid SIM abroad, this feature can help you avoid expensive overages
Vukasin Petrovic is an experienced content specialist and copywriter with expertise in digital marketing, on-page SEO, and inbound lead generation. With a degree in English and a master's in creative writing, he creates compelling content that delivers measurable results for businesses.
It doesn't have to be challenging to have your pocket WiFi at Paris Airport. Learn with us how to ge...
Our mission is simple: to make sure you never have to ask, “What’s the WiFi password?” again. All our tips come straight from personal experience — because we’d never recommend something we haven’t put to the test ourselves.
This website uses cookies so that we can provide you with the best user experience possible. Cookie information is stored in your browser and performs functions such as recognising you when you return to our website and helping our team to understand which sections of the website you find most interesting and useful.
Strictly Necessary Cookies
Strictly Necessary Cookie should be enabled at all times so that we can save your preferences for cookie settings.
If you disable this cookie, we will not be able to save your preferences. This means that every time you visit this website you will need to enable or disable cookies again.