The iPhone 17 is rumored to bring design refinements, performance boosts, and major camera upgrades,...
Mobile Internet
Android’s Data Saver feature is a simple yet powerful tool to help you cut down on mobile data usage. Whether you’re on a limited data plan, roaming abroad, or just want to avoid surprise charges, Data Saver keeps apps in check by limiting background data — all while letting you stay connected to what matters most.


Many apps continue to use data in the background even when you’re not actively using them. That’s where Android’s Data Saver feature comes in.
Data Saver on Android helps you stay in control by limiting background data usage. It’s especially helpful when you’re on a limited data plan, roaming internationally, or simply trying to avoid overage charges.
This article will show you how to use Android’s Data Saver feature, explain how it works, and walk you through additional tips to help reduce mobile data usage and avoid surprise charges.
Data Saver is a built-in Android setting designed to reduce how much mobile data your phone uses, especially when apps run in the background.
What it controls:
This feature is built into Android and available on nearly all modern devices. It works silently in the background to prevent unnecessary data use without interrupting your regular phone activity.
When you enable Data Saver, Android takes several steps to limit background data use and reduce unnecessary consumption.
It blocks most background activity, preventing apps from sending or receiving data unless they’re actively open.
Sync frequency for apps like Gmail, Facebook, or news feeds is reduced, so you won’t get real-time updates until you open them.
It also disables or delays data-heavy features like auto-playing videos and media downloads—which is important considering that, according to Ericsson’s 2024 Mobility Report, video accounts for over 70% of all mobile data traffic globally.
By restricting autoplay and similar features, Data Saver helps minimize one of the biggest sources of data drain.
Some Android manufacturers adjust the name or settings of Data Saver on their devices:
Note: If your phone doesn’t clearly show a “Data Saver” option as described, use the search bar in Settings and try terms like data saver, background data, or data usage. Due to variations in Android skins, the location and label may differ slightly—but the functionality remains the same.
Enabling Data Saver is quick and straightforward. Just follow these steps:
Step 1: Open the Settings app on your Android device
Step 2: Tap Network & Internet (or Connections if you’re using a Samsung phone)
Step 3: Select Data Saver (or Data Usage first if you’re using Samsung)
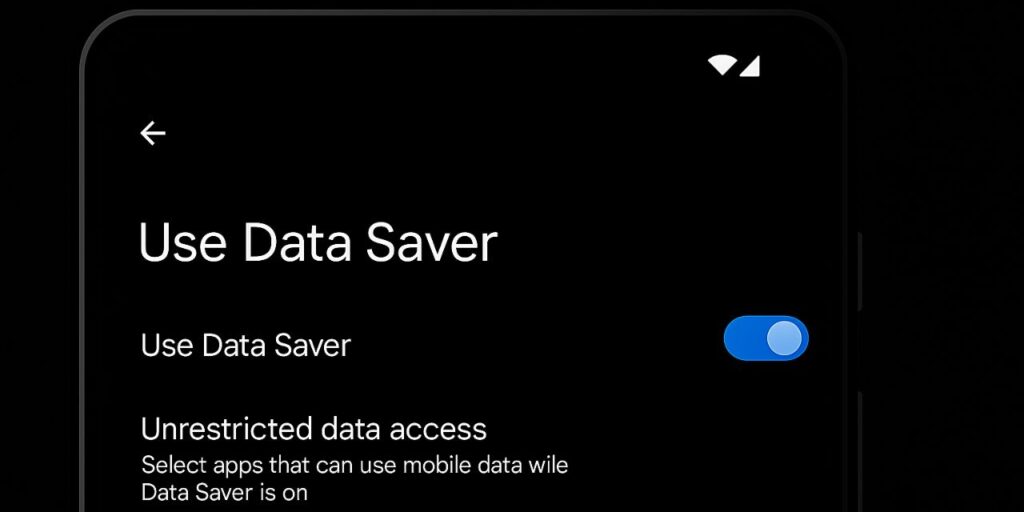
Step 4: Toggle the switch On
Once enabled, you should see a small icon (a plus sign in a circle) appear in your status bar. That’s your confirmation that Data Saver is active.
Some apps need to run in the background to function properly—like WhatsApp for receiving messages or Google Maps for live traffic updates.
If you trust certain apps and want them to work normally even when Data Saver is on, follow these steps:
Step 1: After turning on Data Saver, tap Unrestricted data access (or look for Allowed apps while Data Saver on)
Step 2: You’ll see a list of all installed apps. Toggle On for any app you want to bypass Data Saver (e.g., messaging, navigation, or ride-share apps)
Step 3: Exit the menu — your selections are saved automatically
This gives you the flexibility to save data where it doesn’t matter and allow full access where it does.
Data Saver is a great start, but here are more practical ways to reduce your data usage:
These extra steps give you deeper control over how your phone uses mobile data and help you avoid surprises on your bill.
Data Saver is one of the easiest tools to manage your phone’s mobile usage, but staying data-conscious requires a bit of regular maintenance.

